 View All


 View All


 View All


 View All


Count your blessings
Our lovely contributor Julie, from ActivityBox shares another fabulous DIY that we can do together with our little ones at home just in time for Thanksgiving. We love this activity as we’re big fans of teaching our kiddos and reminding ourselves just how much we have to be thankful for. Happy crafting, mamas!
In a few days, Thanksgiving will be upon us! I’m so happy my daughter, Kelly has been able to celebrate and experience Thanksgiving as a family tradition. Being South African, I didn’t grow up celebrating Thanksgiving but as my hubby is American, Kelly and I now get to enjoy all the American holidays! The hubby has often entertained us with stories about his family traditions growing up so we decided to come up with a meaningful tradition of our own. And of course, it had to be something crafty we could all enjoy doing together!
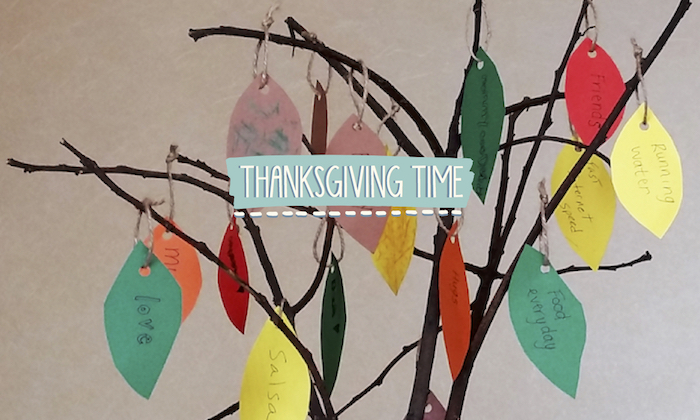
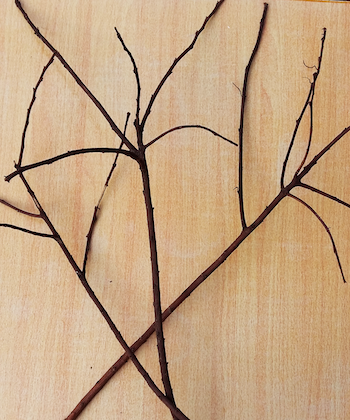
Thanksgiving is a time to be thankful for all we have in our lives and to share fun times with our family. It seemed appropriate to be inspired by nature this year and with that, I bring you the Thanksgiving Tree. You’ll probably have the paper and a few items at home, but if not they are easy to buy. You’ll also need a branch or two to make your own tree! Use this time to take a stroll around your neighbourhood or local park to collect small branches while brainstorming with your kiddo what you’re grateful for.
You can make this type of tree again for other occasions for example gold, silver, red & green shiny leaves for Christmas, Mandarin orange tree for CNY, heart-shaped leaves for Valentine’s Day and flower blossoms for Easter/Springtime.
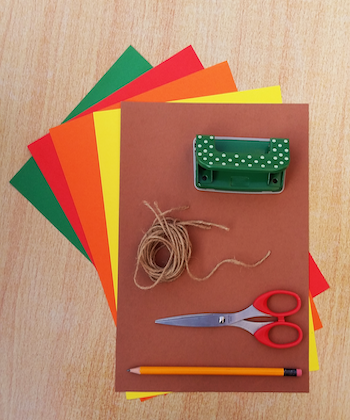
You will need:
- a small tree branch or two
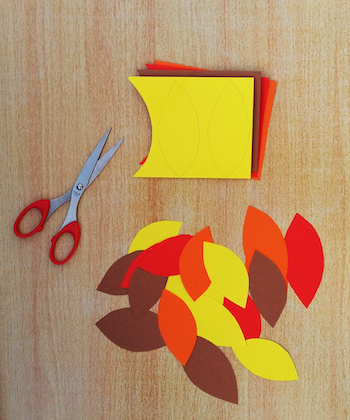
- paper in Autumn colours
- a pencil
- scissors
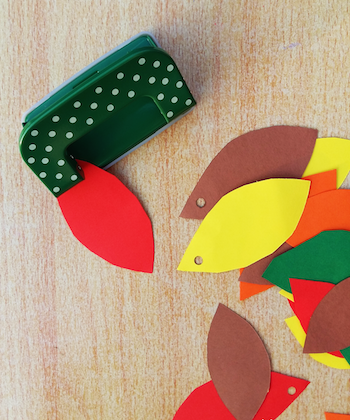
- hole punch
- string to hang leaves
- tall vase or container for branches
- scrap cardboard for leaf stencil (optional)
If you don’t have sheets of paper in Autumn colours you can make the leaves with plain paper and colour them in.
Break or cut off any long bits on the branch to make a nicely shaped “tree”. Make sure the ends aren’t too sharp for little hands! Position it securely in your vase or container.
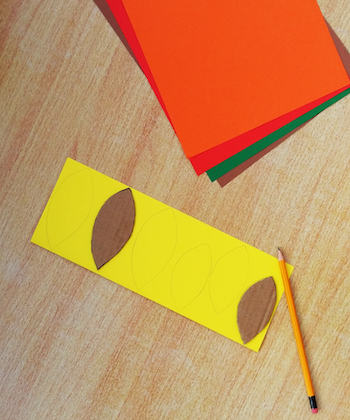
Make a leaf stencil from cardboard if you don’t want to draw free-hand. Leaves can be in a variety of shapes and sizes but just make sure they’re big enough to write a word or two on them. Use a pencil to trace around your leaf stencil.
Tip: Fold over the paper once or twice so you can cut out two or three leaves at the same time
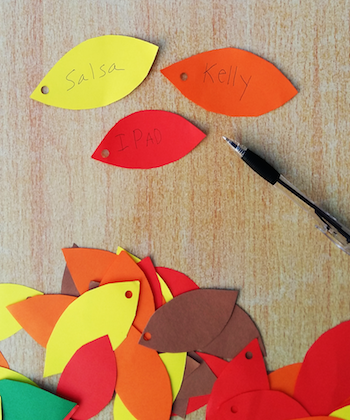
Cut out your leaves (great opportunity for your littles to practice their fine motor skills!). This is also a project you can do over a few days or even weeks. You can start with a few and then add a leaf each day. Write down something you are thankful for that day!
Punch a hole through your leaves. To extend the activity, we made leaf rubbings (hubby’s idea!). We placed leaves over different textures and rubbed over them with wax crayons. They looked great!
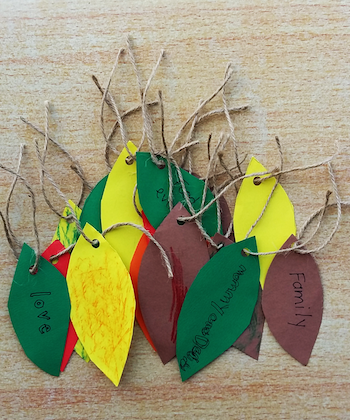
Talk about different things that you are thankful for. Write one thing down on each leaf. Get the whole family involved! It’s fun to discuss and explore the different people and things we are thankful for. If your child is still too young to write themselves, they can trace over your word or draw a picture. Or you can write words for them.
Cut your string into pieces to attach your leaves. Each piece needs to be long enough to tie the knot and still hang on branches. Repeat for each leaf you plan to make.
Now make your tree! Carefully place your leaves on different branches. You can even glue or staple 2 or more leaves together to make a bunch of leaves. Store leftover leaves in a bowl next to your tree.
Tip: If the tips of your branches are really thin, you can put a leaf on through the punched hole without using string.

