View All


 View All

 View All


 View All


Encourage those curious young minds!
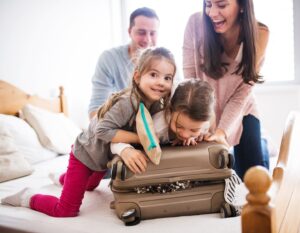
Each year, 11 February is marked as the International Day of Women and Girls in Science. We agree that it is really important to encourage young minds (boys and girls!) to connect with science around them, and observe and understand some of the natural occurrences around them. At Curiosity Kids, that’s our mantra! These home science experiments are fun, engaging and can be done with simple and easy-to-find materials. So do make sure you give them a try!
Jump ahead to home science experiments that are suitable for:
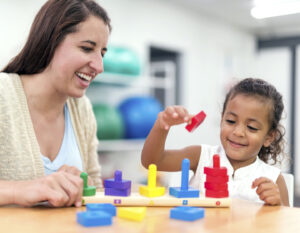
Younger Kids (2 to 5 years)
Older Kids (5 to 8 years)
Read more: Home Learning Activities: How To Engage And Educate Your Kids
Younger Kids (2 to 5 years)
Make A Puppet
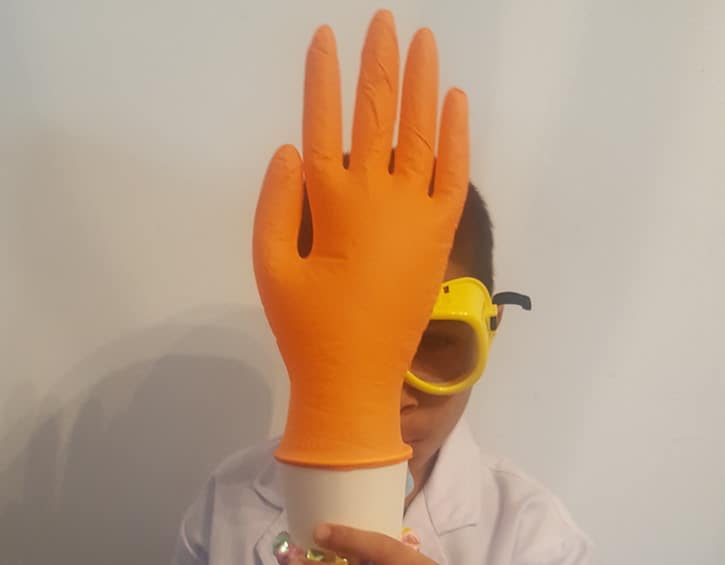
What you will need:
- A small paper cup
- A latex glove
- A straw
- A few stickers (optional)
Let your child decorate the cup with stickers. They can also stick some on the glove, or draw two eyes and a smile on each of the fingers of the glove. Now, make a small hole in the side of the cup. Insert the straw through the hole into the cup and put the glove onto the cup and ask your kids to blow into the straw.
When they blow into the cup through the straw, air goes in and inflates the glove, when they suck the air out through the straw the glove shrinks. Talk to them about air and how we can feel it and the impact it has on other objects (even if we can’t see it). If you have drawn eyes on the gloves, when inflated, each finger looks like a puppet.
Dinosaur Digging
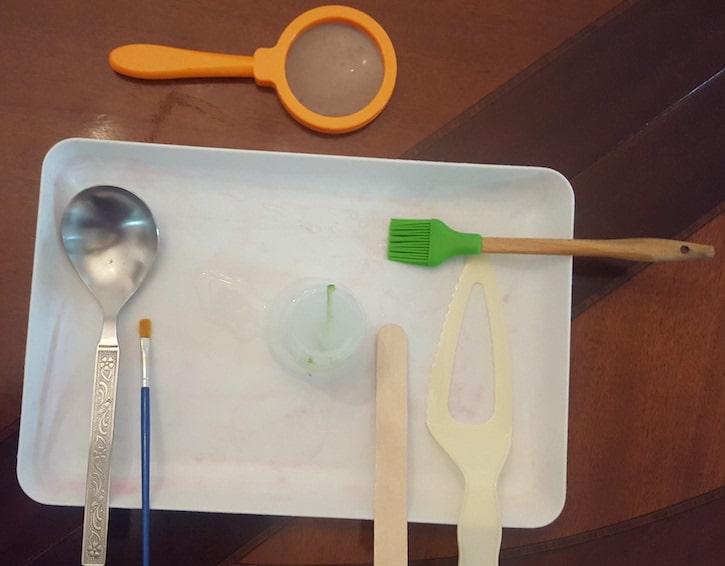
What you will need:
- A small, new dinosaur toy
- A bowl that’s bigger than the toy
- Water
Fill the bowl with water to the brim and put the dinosaur into it, completely immersing it. Now put the bowl into the freezer for 5 to 6 hours (or overnight).
Take out the bowl and ask the kids to excavate the dinosaur out of the ice. Let them use kitchen tools such as spoons, a spatula etc. While they are working hard to get it out, talk to them about fossils and how paleontologists work to find out about dinosaurs and other prehistoric animals through fossils. If you see them struggling a bit, add a few drops of hot water onto the ice and discuss what happens with your kids. Explain what melting is and how ice and water are actually just different states of matter.
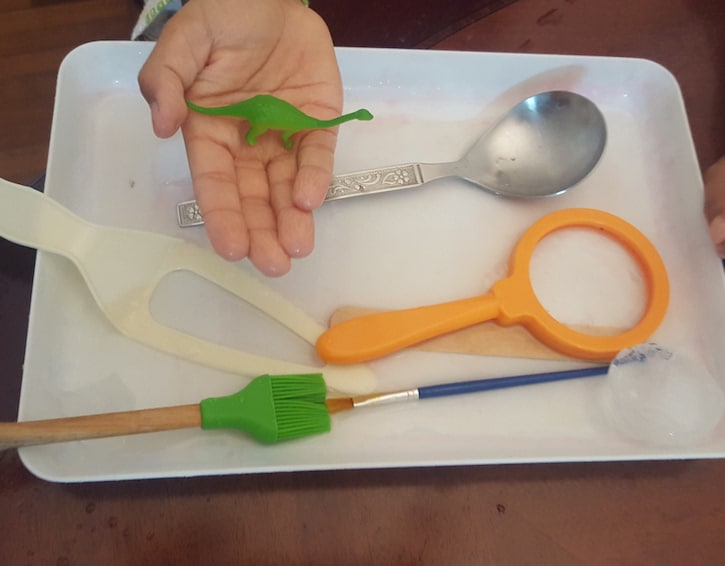
Eventually, as the ice melts, the kids get to keep their new toy – they will have earned it after all that excavating! I used this simple home science experiment as an activity at my son’s birthday party and it was a big hit.
Primary Colours
What you will need:
- Watercolour paints of the three primary colours (red, blue and yellow)
- If you also have a test tube and dropper set, use that. If not, plain transparent cups work just as well
Add water to the three cups and then add some red paint to one cup, blue to the other and yellow in the last one, and let the paint and water mix well in each. Now ask your little ones to mix any two colours in a separate transparent cup. They will be amazed to see how red and blue will make purple! Talk to them about how we can make dark purple (by adding more blue) or how can we make light purple (by adding more red). Try other combinations of colours to see what they get.
Read more: 10 New Hobbies To Try In 2020
Older Kids (5 to 8 years)
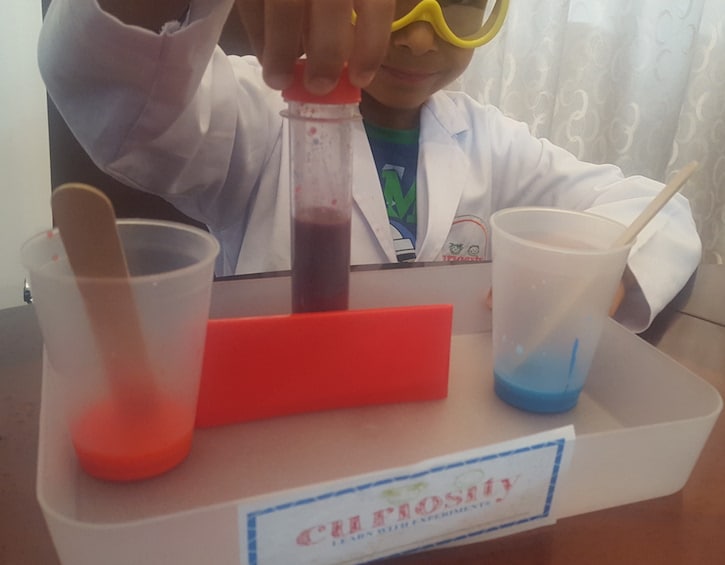
Bubbles In Oil
This experiment is aesthetically pleasing. What you will need:
- A transparent cup
- Water
- Vegetable oil
- Any food colours you have at home
Add some water to a cup (if you have a test tube in your child’s play chemistry kit, that’s even better!). Fill it half with water and then add a thick layer of oil to it. The oil will form a layer right above the water and will not mix with it. Now give your child a choice of different food colours, each diluted in a bit of water (note: don’t dilute too much so that you keep a slightly thick consistency). Now draw it in with a pipette or a plastic syringe (the sort that you get with children’s medicines in HK) and get your child to slowly add drops of different colours into the test tube/cup filled with oil and water. Carefully, release one drop at a time.
What happens is really pretty to look at. The colour droplets will go through the layer of oil but not reach the water. And since the water-based colour droplets will not mix with oil, they will remain beautiful pearly-shaped coloured suspensions floating on top of the water!
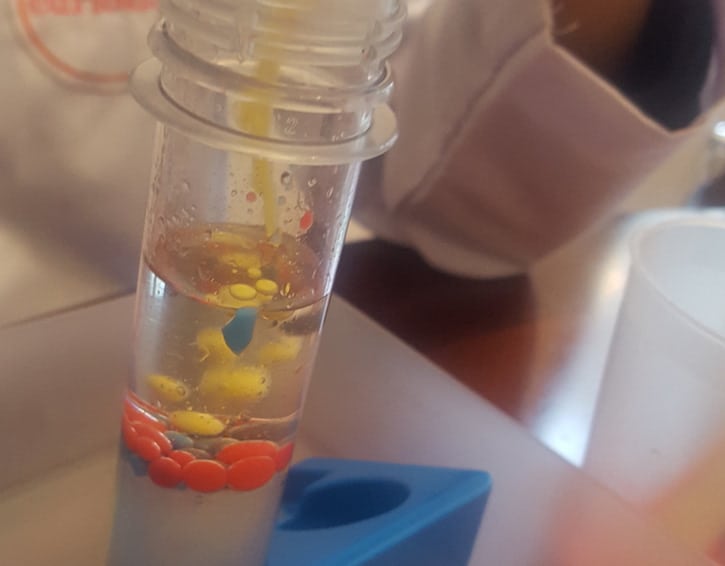
This experiment is a great way to teach children about the concept that water and oil molecules do not mix…even if you shake the test tube or the cup (look at this quick video here)! With this experiment, you can also talk about polar and nonpolar molecules (water being a polar molecule i.e one side has a positive charge and the other side has a negative charge, while oil is a non-polar molecule).
Walking Water
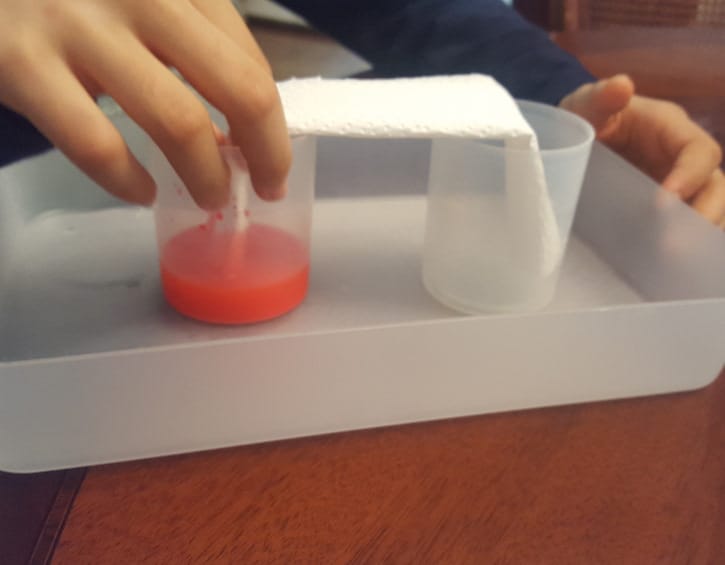
What you need:
- Two transparent cups
- Kitchen roll
- Any food colour
Fill one cup with some water (about ¼ full) and add the colour you have and mix it well. Now fold a piece of kitchen roll along the longer side and dip one side of it into the cup with coloured water, and the other end into the empty cup. Leave these cups for a couple of hours after which you will see coloured water starts to move from the cup with coloured water into the empty cup! You can also use multiple cups and colours to make it even more fun.
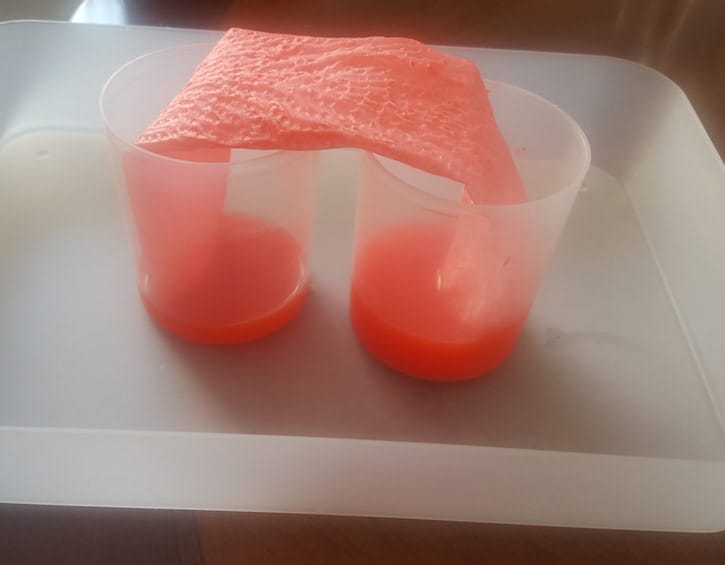
The coolest thing about this home science experiment is connecting it to everyday life. We all know gravity pulls everything down, but how does the water actually climb up through the tissue paper to move to the other cup? This is due to a process called capillary action, which is the ability of a liquid to flow against gravity (in this case). This is how tall trees get water from the soil to reach all the way up to their highest branch.
Catapult
What you need:
- Eight ice cream or popsicle sticks
- Three rubber bands
- A table tennis ball
- A used plastic bottle lid
Stack six ice cream sticks on top of each other and secure them with a rubber band at each end. Now take a separate popsicle stick and glue on the top of the plastic bottle lid close to one of the ends. Take the last remaining stick and place it under the seventh stick (which has the plastic bottle lid stuck on). Leave the side which has the plastic bottle lid as is and use a rubber band to hold the other end of these two sticks together firmly, leaving a fat finger space at the very end. What you should now have is two sticks joined together at one end, with a little room to push them apart at the other. Finally, push the stack of six sticks joined together through the open end, as far back as possible, without disturbing the rubber band holding sticks seven and eight together. The end result should now look like a catapult (see image below).
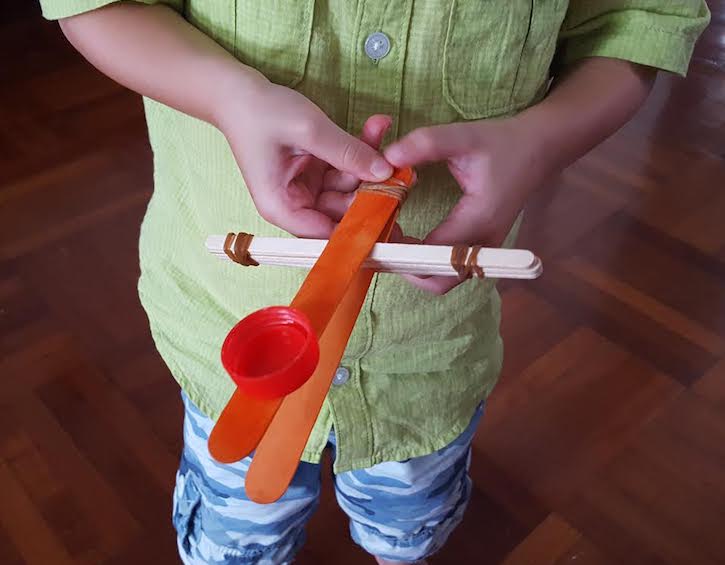
Now get your child to place the catapult on a table or floor with the bottle lid facing towards him or her. Put a table tennis ball inside the lid. What he or she needs to do is slowly press the end of the stick down and release it. The ball will go flying away! You can try this with different objects i.e pom poms, cotton balls etc. Notice the difference in what happens and which object goes the farthest. Please note that you shouldn’t let your kids try heavy objects such as marbles in a catapult.
What you can discuss with your budding scientist is potential energy, and how the catapult uses the potential energy stored in the rubber bands to shoot the objects far away!
Read more: Extracurricular Activities And Classes In Hong Kong: From Toddlers To Teens