 Post Category - ChristmasChristmas
If you’re looking for a fun, festive activity with your kids, why not make your own Christmas decorations? Try these DIY decorations at home during the winter break!
Get into the festive spirit with your little ones by creating DIY Christmas decorations! If you have already enrolled your kids in winter camps and are looking for more fun activities to do with them during the winter break, we have put together some festive arts and crafts that you can do with everyday household items. These DIY decorations will add a personal, festive touch to your home and create lasting memories for the family.
Read More: Where To Buy Christmas Decorations In Hong Kong
 Paper Reindeer
What You Need:
- Paper Plate
- White, brown and red craft paper
- Black Marker
- Scissors
- Brown paint
- Glue
Method:
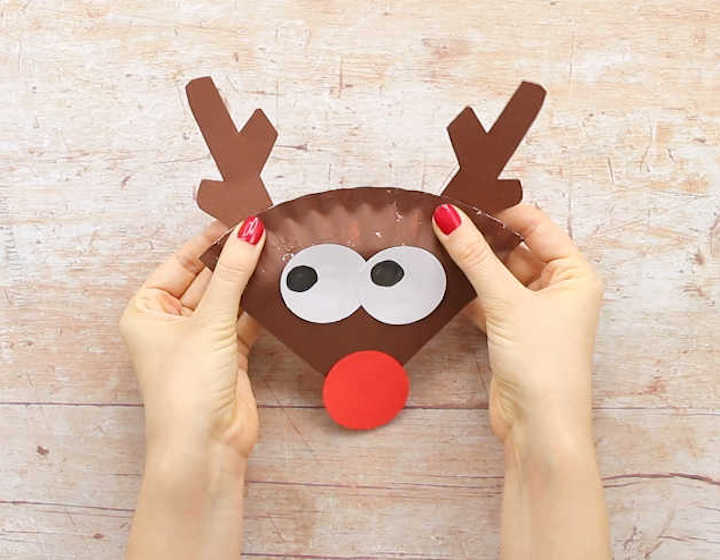
Start by painting the paper plate brown (or you can simply purchase a brown paper plate). Once the plate is dry, cut it in half and then cut one of the halves in half again. Cut two circles from white craft paper for the eyes, one circle from red craft paper and two antlers from brown craft paper. Stick the eyes, nose and antlers onto the paper plate and use a black marker to draw googly eyes. Your adorable reindeer is now ready!
Source: EasyPeasyandFun via Pinterest
Read More: 2023 Christmas Markets & Bazaars In Hong Kong
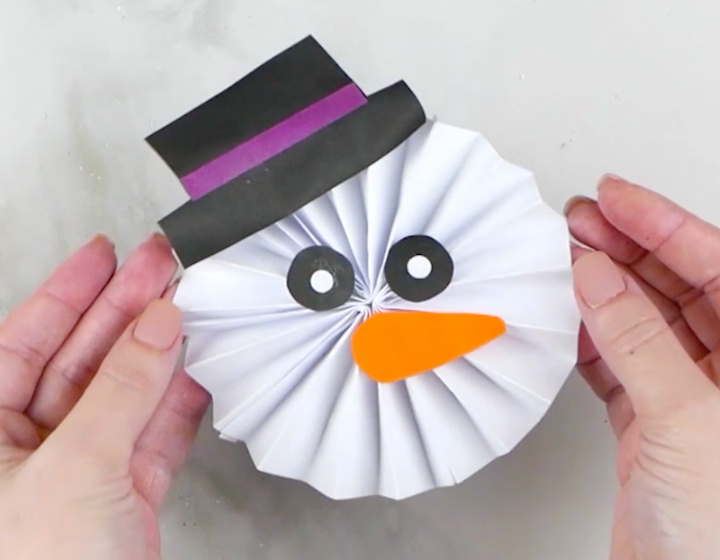
 Paper Snowman
What You’ll Need:
- Orange, black and white paper
- Glue
- Scissors
Method:
To make a paper snowman, take a piece of white A4 size paper and cut it into four equal parts. Fold each piece like an accordion and then fold it in half. Glue the four folded pieces together to create a circular fan. Cut the black paper in the shape of a hat and eyes, and the orange paper in the shape of a carrot for the nose. Finally, glue the hat, eyes, and nose to the folded circular paper to complete your paper snowman.
Source: EasyPeasyandFun via Pinterest
Read More: Ice Skating In Hong Kong – Ice Hockey And Skating Rinks
 Rocking Santa Claus
What You’ll Need:
- White and red craft paper
- Black Marker
- Light pink colouring pencil, crayon or a marker
- Glue
- Scissors
Method:
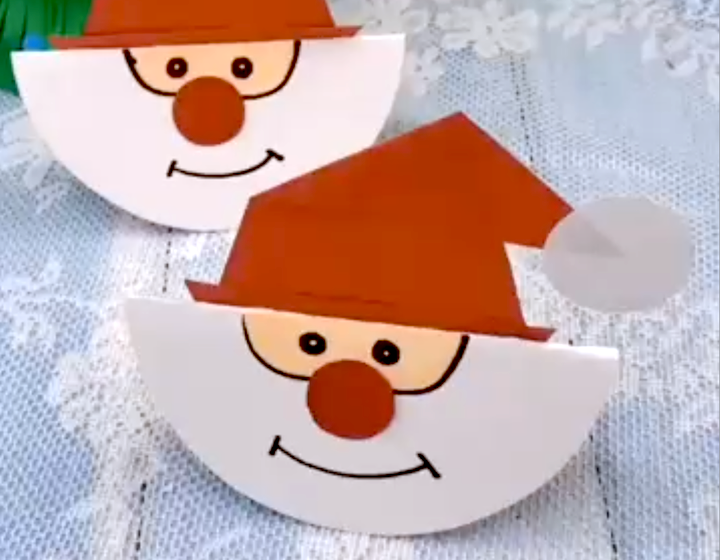
Start by cutting a circle out of white paper and folding it in half. On the flat end of the semi-circle, draw an upside-down soft W to create Santa’s face. Colour it in with a light pink colour. Then, draw the eyes and lips with a black marker as shown in the picture. Cut two small circles, one out of red and one out of white craft paper. Stick the red circle as the nose and cut the red paper in the shape of a hat. Finally, stick the hat on the flat end of the semi-circle to complete the Santa Claus face.
Source: Craft Anyone via Pinterest
Read More: Where To Meet Santa In Hong Kong In 2023
 Felt Christmas Tree
What You Need:
- A template to cut out stars
- Different colours of green, red, and blue felt for the stars (go with whatever you have)
- Yellow felt for the star on top
- Needle and thread
- Glue gun
- Scissors
Method:
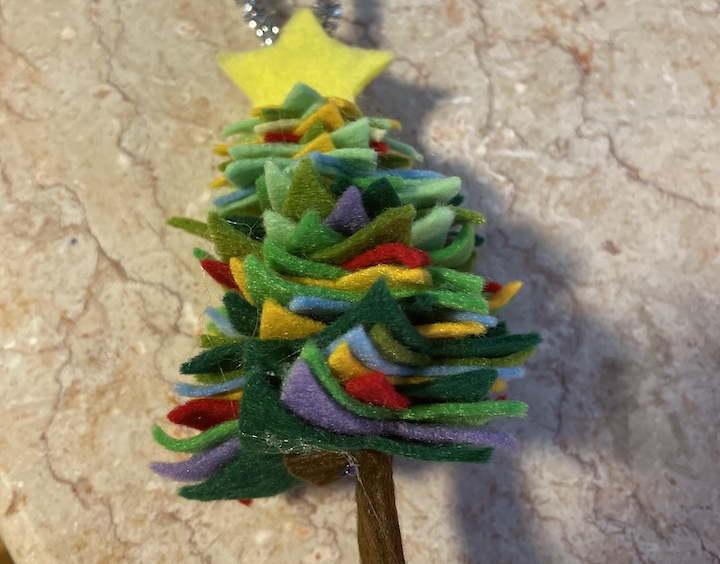
Use whatever scraps of felt you have. Cut them out in the shape of stars and sew them together to make a compact multi-coloured felt tree. Add a larger yellow star on top. Use glue to stick it to the top. Similarly, use a glue gun to stick a piece of brown felt at the bottom to complete your tree.
Source: Tarana Desai Shah, Sassy Mama Contributor
Read More: Toy Stores In Hong Kong – Where To Buy LEGO, Jellycat, Fidget Spinners And More
Editor’s Note: “4 Easy DIY Christmas Decorations We’re Making With The Kids This Year” was most recently updated in December 2023 by Sassy Mama.
 View All





 View All


 View All


 View All

